Remote Development on EC2 for the BusTub DBMS
This tutorial is a quick-and-dirty walkthrough of spinning up an EC2 instance for remote development on the BusTub database management system.
Walkthrough
Begin by visiting the AWS management console. Create an account if you do not already have one. Account creation requires a valid credit card number, but the resources we use for this class will all use the Free Tier so you won’t be charged.
Once you have created your account (or if you already have one) sign into the AWS management console. From the home page of the management console, select Services from the top-left corner, and select EC2.
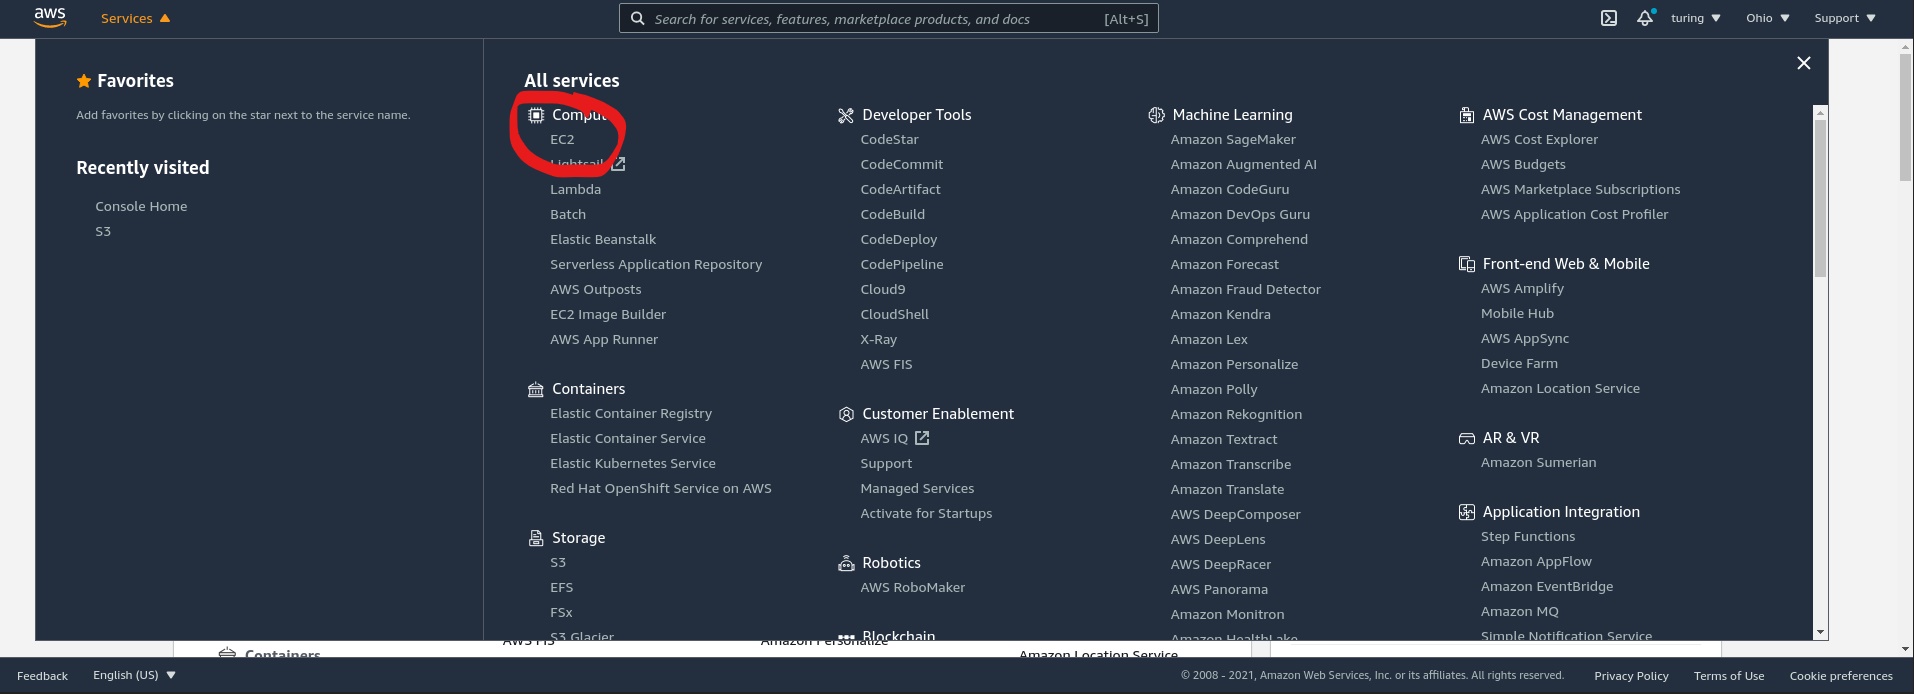
The main page for the EC2 service gives you an overview of your current resource usage on EC2 (if any). From this page, select Launch instance.

This begins the instance creation process. EC2 gives you many options for configuring instances to meet your specific needs. For example, if you want to allocate additional resources (memory, compute, storage, etc.) to your instance, now is the time to do so. In this walkthrough, we will provision a minimal development environment for BusTub with EC2’s free tier.
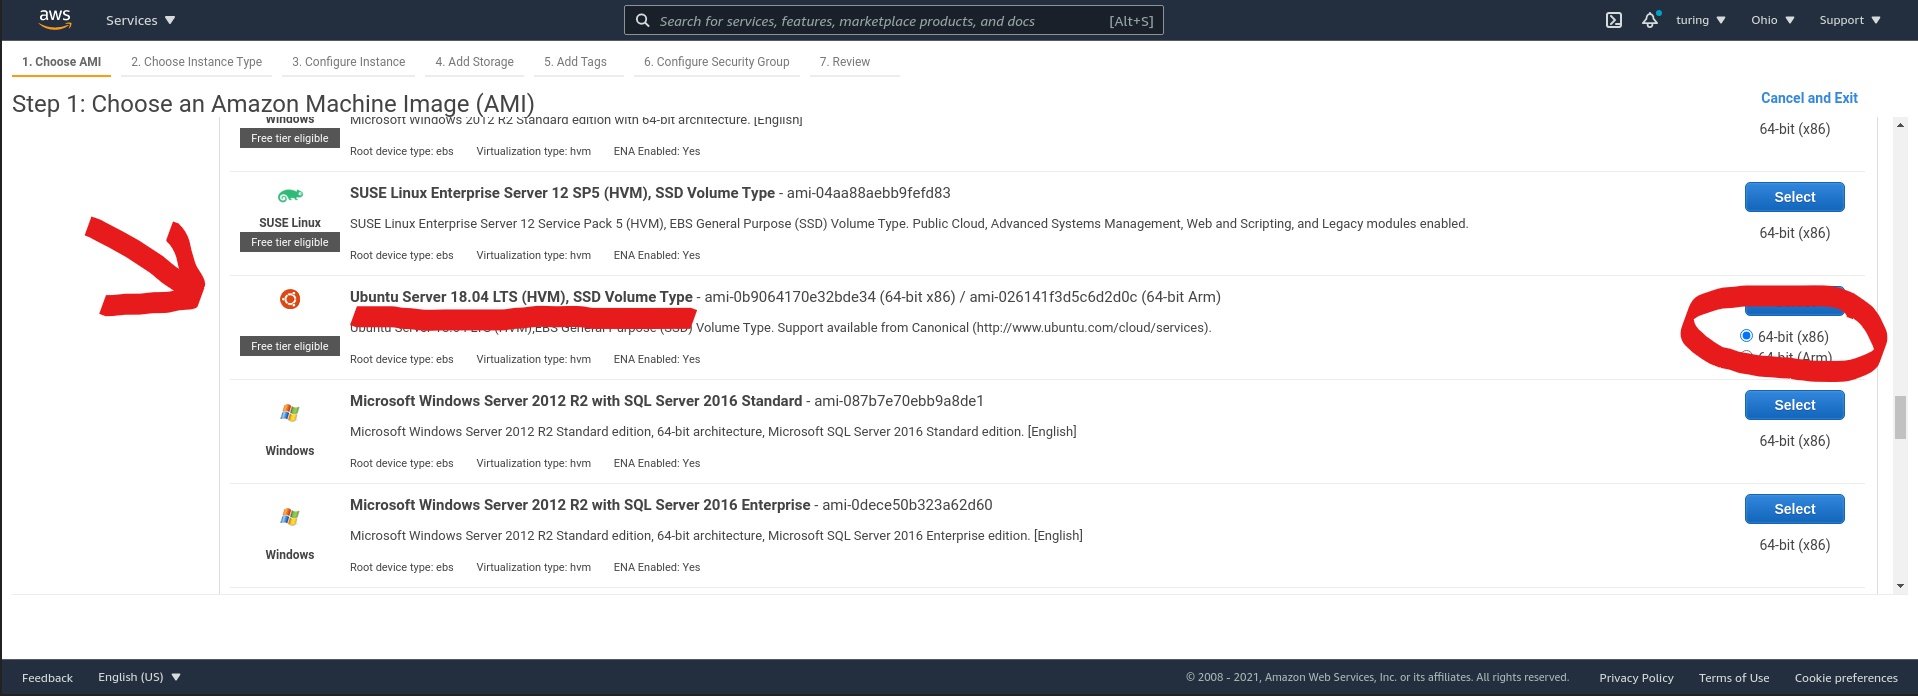
The first thing we need to select is the AWS Machine Image (AMI) for our instance. This determines both the operating system for our instance as well as the hardware on which it runs. From the list of available AMIs, select the AMI Ubuntu Server 18.04 LTS (HVM), SSD Volume Type. The annotation should indicate that this AMI is “Free tier eligible.”
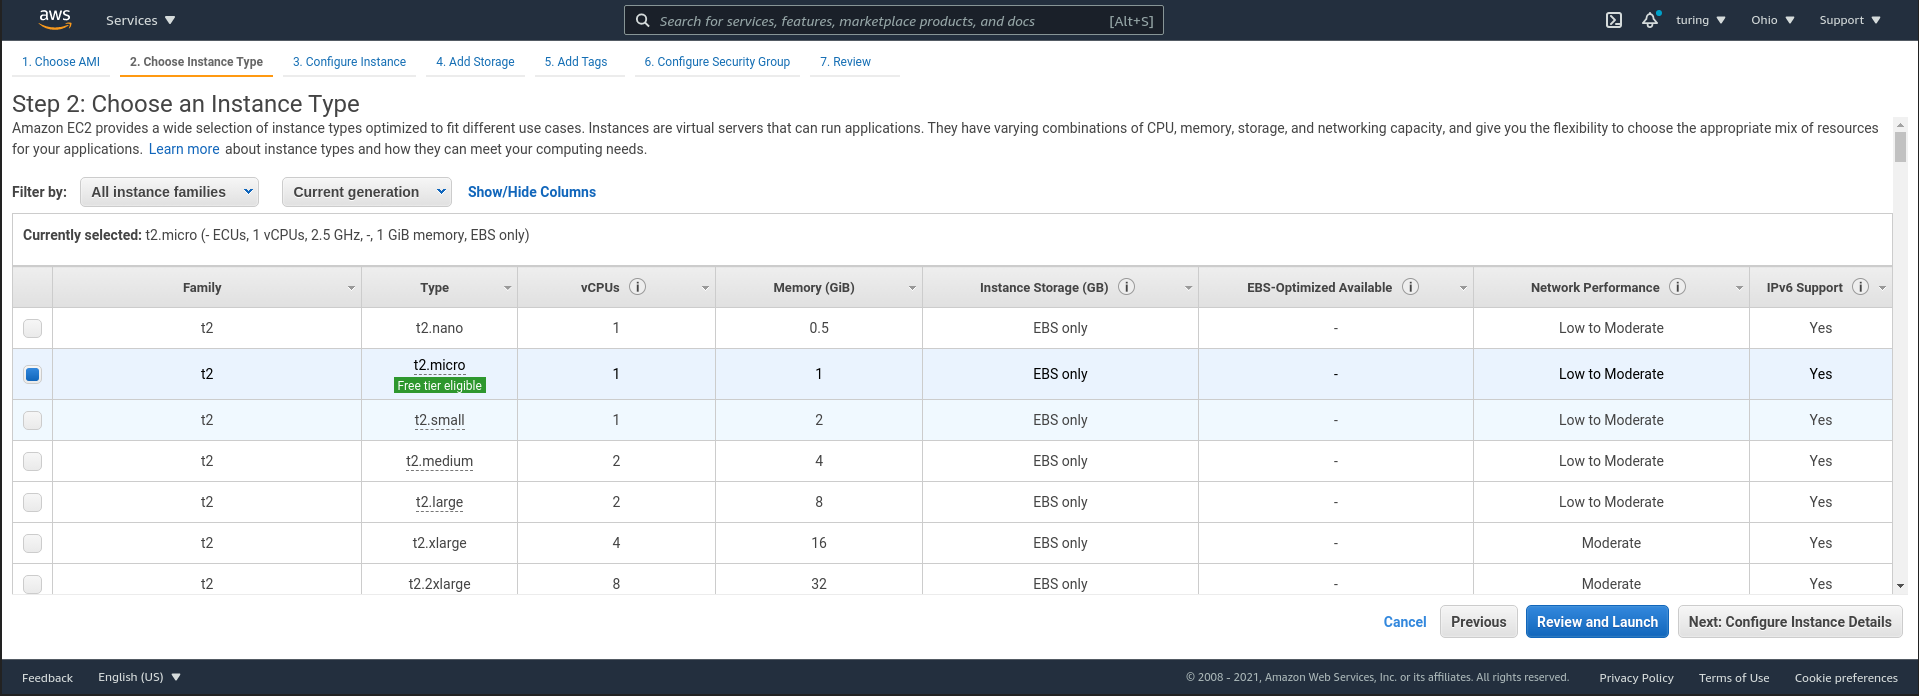
On the next page we select our instance type. Again, for our minimal setup we select a t2.micro instance type. Using this type restricts the resources (memory, compute) available in our build environment, but keeps us on the free tier.
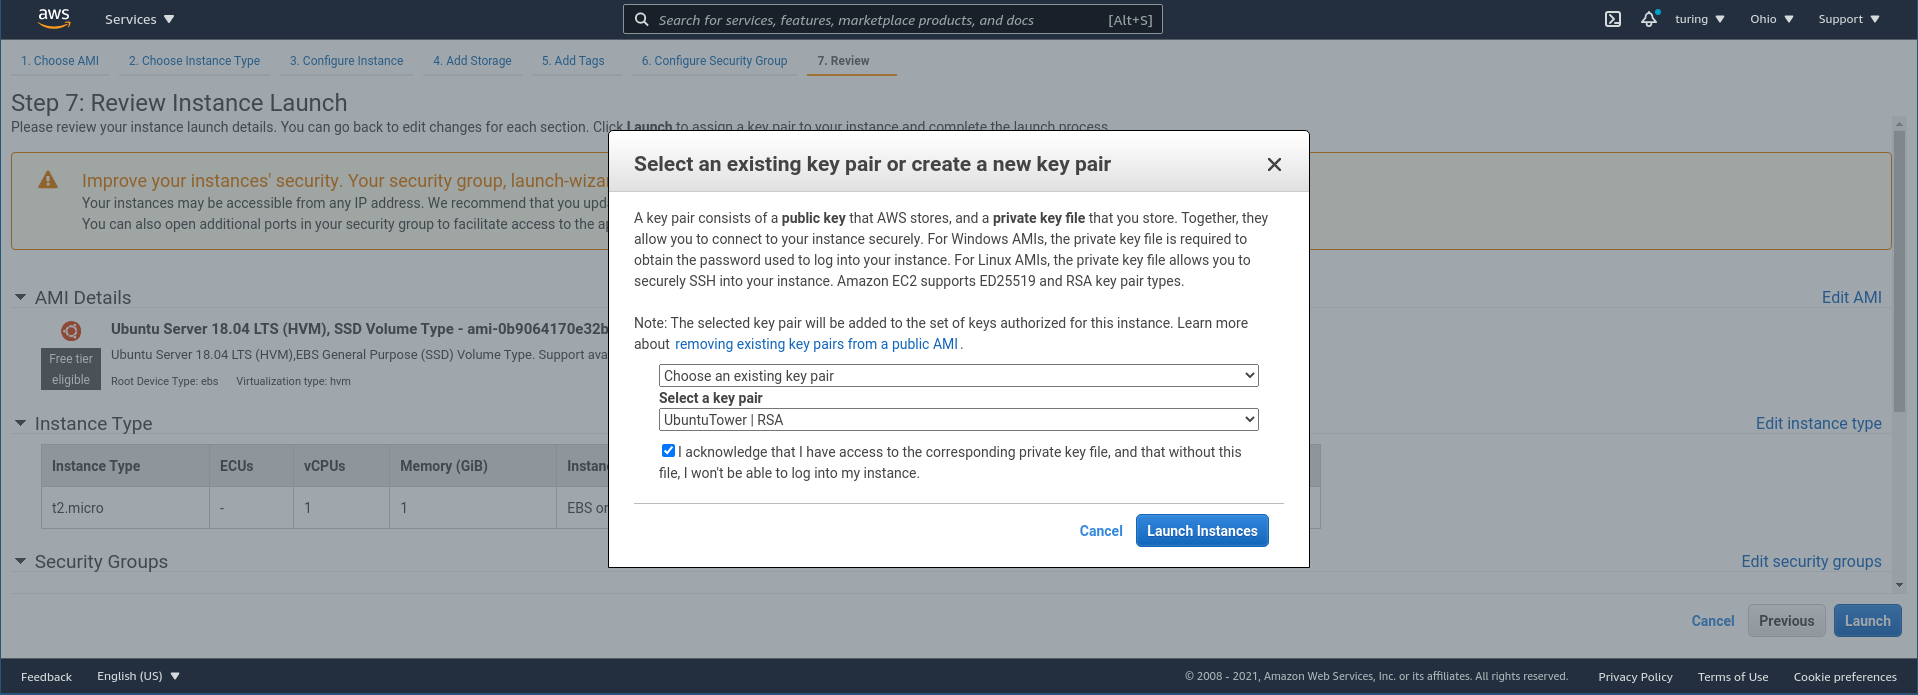
Now skip to the end of the instance creation process. You can review the details of the instance here to ensure that they are correct.
We have not set up a custom security group for our instance, so its port 22 (SSH) will be open to the public (read: the millions of SSH spiders roaming the internet looking for open ports). You can modify the security group to only allow SSH traffic from your particular external IP address, but when using this option you need to be careful to ensure that your external IP remains constant (this is very rarely the case).
The final (extremely important) step is to configure the SSH keys for the instance. Without an SSH key pair, you will be unable to access your instance. The dialog will prompt you to either create and download a new key pair or copy-and-paste the public key from an existing key pair.
After clicking Launch instances EC2 will go to work provisioning your instance. Navigate to the instances page for your EC2 resources and select the newly-created instance in the list of instances. Once the instance state transitions to Running you will be able to select Connect from the options above the list of instances. On the next page, select SSH Client and copy the command that appears beneath Example.
You may have to change the argument to -i (the private key of the key pair specified during instance creation) if the name on your local system is different from the one shown, or if you need to add the path to the key file. If you use the default SSH key associated with your profile (e.g. ~/.ssh/id_rsa if you use ssh-keygen on a UNIX-based system) you can skip the -i argument altogether and the default key will be used automatically.
You should now have an interactive prompt on your new EC2 instance over SSH. At this point, you can follow the procedure below to compete setup of the development environment:
# Update dependencies
$ sudo apt update

# Setup your private copy of BusTub
$ git clone --bare https://github.com/cmu-db/bustub.git bustub
$ cd bustub
$ git push --mirror <YOUR_PRIVATE_REPO>
$ cd .. && rm -rf bustub
$ git clone <YOUR_PRIVATE_REPO> bustub
$ cd bustub

# Install dependencies
$ sudo ./build_support/packages.sh

# Configure BusTub
$ mkdir build && cd build
$ cmake ..

# Check that everything works
$ make check-format
$ make check-lint
$ make check-clang-tidy
$ make check-tests
The final step is setting up an editor or IDE to work with this remote environment. If you use a terminal-based editor like emacs or vim, no additional setup is required. If your prefer a graphical editor like Visual Studio Code or an IDE like CLion, it should be possible to configure these for remote development on this EC2 instance.